Thursday, May 23, 2013

Browned Butter....I never knew you till now...

What a delightful invention browned butter is. Nutty and sweet giving everything it touches a new flavor. This may sound like a love letter, and maybe it is. Browned butter's awesomeness was everything I dreamed it would be, and while I was intimidated it was so easy! This was an adventure and I am so glad I took it! And now for the recipe!


little dollops of yumminess and yes that is a glass of milk; they are rich!


Browned Butter Oatmeal Chocolate Chip Bites
adapted from Tip Top Shape

Ingredients

1/2 cup of unsalted butter
1/2 cup of sugar
1/2 cup of loosely packed brown sugar
1 large egg
1 1/4 cup all-purpose flour
3/4 cup oats (not quick-cook)
1/4 teaspoon salt
1/2 teaspoon baking powder
1 1/2 teaspoon cinnamon
1 cup chocolate chips


Process:

In a small sauce pan, on medium heat, heat the butter constantly whisking until browned. (It should resemble caramel color and emit a nutty smell) Remove from heat and continue to whisk for 30 seconds. Let butter cool completely before you use it.

In a medium bowl mix the flour, baking powder, salt, cinnamon, and oats and set aside.

Once the butter has cooled mix it with the two sugars in a large bowl. Mix in the egg and vanilla. Add the flour mixture and combine with hands until a dough forms. 

Chill covered in the refrigerator for 30 minutes.

Preheat over to 375F

Form dough into 1 1/2 inch balls and place on a parchment lined baking sheet. 

Bake 10-12 minutes or until the edges and bottoms are golden brown.


Enjoy with coffee! Or milk or anything because you will enjoy these!               


Maple Nutmeg Donuts

How is this the first time I am posting about donuts?!?!? I am a little angry with myself. I love donuts. You may have misunderstood me...

 I LOVE DONUTS!!!

Always have. Always will (I can't possibly know that but if the last 28 years are any indication then we are in for a long love affair....I'm ok with that) One of the greatest things I have discovered is that they don't have to be fried you can bake them and they are delicious and healthy! (ok well maybe not healthy, but healthier? yeah let's go with that!)

I have tried many recipes and the thing I love about the recipe I am going to share is that you can add anything to it to make the donut you want. It is a great basic buttermilk donut and every time I have made it (a few times....) it has been fantastic.  If you don't have a donut pan I highly recommend getting one, just so you can make these and be the envy of your friends :)

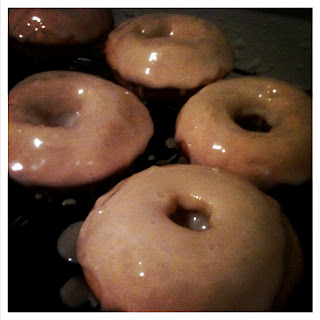
mapley glazey goodness...I wish had one right now.


Nutmeg Buttermilk Donuts
adapted from A Beautiful Mess

Ingredients
1 1/4 cup flour
3/4 sugar
1/2 teaspoon baking soda
1/2 teaspoon salt     
1/2 teaspoon nutmeg (or any other spice or tea or cocoa or nothing at all, totally optional)
2/3 cup vegetable oil
1/2 cup buttermilk
1 egg
1/2 teaspoon vinegar
1/2 teaspoon vanilla extract

Process

Preheat oven to 350F

In a large bowl combine the flour, sugar, baking soda, salt, and nutmeg. In a medium bowl comine the oil, buttermilk, egg, white vinegar, and vanilla. Pour the wet ingredients into the dry and mix until just combined. Fill greased donut pan 2/3 full and bake for 10-14mins (the is a large gap because mine are done after about 11 but I have a wacky oven).

Let them cool for a few moments in the pan and then transfer them to a wire rack to continue cooling.


Maple Glaze

*I have found that I like a thicker glaze on my donuts and so I amp up the powdered sugar to get the thickness and still have the flavor. Feel free to tone it down. Gradually mix it together and taster as you go.*

Ingredients
  
1-2 cups of powdered sugar
2 tablespoons of maple syrup (higher grade the better flavor but any will work)
1 tablespoon of milk
1/2 teaspoon of vanilla extract

Process

Combine all the ingredients together starting with 1 cup of sugar and add more sugar to get desired consistency (thick enough to stay on without getting too absorbed into donut).

Once optimum consistency is reached dip tops of donuts gently into glaze and replace back on wire rack (you may want to lay some parchment paper down because the glaze will drip). After all the donuts have been dipped spoon remaining glaze over the donuts


Eat immediately and enjoy; preferably with some coffee!         


PB&J Cupcakes

I love peanut butter and jelly sandwiches. As a child I would sneak spoonfuls of peanut butter when my dad wasn't looking. And today I still sometimes just fill a spoon with peanut butter or almond butter and eat just that. But the combination of peanut butter and jelly is one of my all time favourites. You just can't go wrong!

This recipe is a little interesting. I wouldn't say it is my favourite and I will probably (someday) post a revised version BUT this is a good version (I just know I can do it better) The cu
pcake is quite dense and cookie like, which I really liked, and the frosting is a touch on the sweet side but it balances out the not so sweet cupcake. Without further ado!

Well aren't you pretty...too bad I am gonna eat you :)


Peanut Butter Cupcake
adapted from Taste of Home

 Ingredients
1/3 cup of butter, softened
1/2 cup smooth peanut butter (although I am sure chunky would add a nice texture)
1 1/4 cups of packed brown sugar
1 egg
1 teaspoon vanilla
2 cups all-purpose flour
1/2 teaspoon salt
1/2 teaspoon baking powder
1/2 teaspoon baking soda
3/4 cup milk (I used 2%) 

Process

Preheat over to 350F and fill a muffin tin with liners

In the bowl of your mixer cream together the butter, peanut butter and brown sugar until light and fluffy. Beat in the egg and vanilla. 

In a medium bowl combine the dry ingredients

Add the dry ingredients and the milk alternatingly into the creamed mixture. Beat well after each addition.      

Fill paper lined muffin cups 2/3 full (they do not rise very much) Bake for 18-22 minutes or until a toothpick comes our clean.

Cool before frosting.

Raspberry Buttercream 
adapted from The Curvy Carrot  

4 sticks of butter, at room temperature
1/2 cup of raspberry jam (this is all by taste; as little or as much raspberry as works for you)
2-3 cups of powdered sugar (go with taste on this one again)

Begin by creaming the butter and slowly add in 1 cup of sugar and some of the raspberry jam and wait until it has fully mixed and then taste and add more of what ever is lacking. Once you have achieved your desired flavor and consistency frost your delicious cupcakes.

**One thing I have learned about frosting is that so much of it comes down to taste. The butter generally stays the same and you can play around with the sugar. Just taste as you go (so important)*


A Stop in the Savory Zone.

Jalapeno Cheese Biscuits.....oh yes.....get excited!!!!

These biscuits are part buttermilk biscuit and park folded biscuit and whole amazing (I am sure you saw that coming)! The best thing about these is that there are super versatile and can be experimented with easily. They are great by themselves and tons of different things could be added in. Our favourite is jalapeno and cheese. I want to try some other savory combinations and then I am also curious as to how these would work with some sweet add-ins OR sweet and savory in the same biscuit. The ideas are flowing but I am getting off track; you want the recipe and I want to give it to you. I adapted this recipe from Homesick Texan; her blog is great. Reliable good recipes (my favourite kind).  So here we go! 


This is how they bake! So cute right?! And so delicious (they lasted two days)!


Ingredients

2 jalapenos (if you want them less spicy deseed them)
2 cups of flour 
1 tablespoon of baking powder
1/2 pound of cheese, shredded or cubed (I like pepper-jack)
1 teaspoon of sugar
1/2 teaspoon of salt
1 stick of butter, cold
3/4 cup of buttermilk, cream or half-and-half (something with good fat content)

Method:

Preheat oven to 450F

Saute jalapeno and then pat away any excess oil before you mix them in with the dry ingredients (we tried them raw last time and they weren't as good but if you want to give it a go do it!)

Mix jalapenos, flour, baking powder, cheese, sugar, and salt.
Cut the stick of butter into pieces, and work into the flour mixture with your hands or with a pastry blender until it resembles pea-sized crumbs.
Add the liquid, mixing until a bit loose and sticky.

Pour dough out onto a well floured surface and knead for a minute. Dough should be smooth andno longer wet. You can sprinkle more flour on the surface if you find it is sticking.

**Now the fun part :)**

Take dough into a ball, and it hit it with a rolling pin, turning it and folding it in half every few whacks. Do this for a couple minutes.

Then roll out the dough until it's 1/4 in thick and then fold it in half.

Using a round cutter or a glass cup dipped in flour cut out your biscuits. Re-roll and refold as much as necessary until all the dough has been used.

Arrange the biscuits on a parchment covered baking sheet close together so that they rise up instead of out. Your arrangement should look similar to the about picture.

Makes 10-12 biscuits (possibly more depending on size of cutter).             


*Try to wait until the cool down to eat them but let's be honest a burnt tounge is worth their deliciousness*

Enjoy!       


Gluten Free Treat

A few months back for a work function I made some gluten free chocolate and coconut cupcakes. These were delicious cupcakes! Gluten free has been a new adventure for me and I enjoy it; especially when I am using coconut flour. Coconut flour takes more eggs (6 at some points!) to give it the same fluffy light quality as an all purpose flour and so I don't use it often, but when I do I am never disappointed. I have mentioned Elan's Pantry before on here and again if you have food allergies or are looking to try working with different materials I highly recommend her blog. Both of these recipes are adapted from hers.


Left: toasted coconut vanilla Right: chocolate vanilla cinnamon 


Vanilla Cupcake with Toasted Coconut Vanilla Buttercream
 
Cupcake Ingredients
1/2 cup coconut flour (sifted)
1/2 teaspoon sea salt
1/4 teaspoon baking soda
6 eggs
1/2 cup grapeseed oil
1/2 cup honey
1 tablespoon vanilla extract
 
Preheat oven to 350F
 
In the bowl of your mixer combine flour, salt, and baking soda.
In a small bowl whisk together eggs, oil, honey, and vanilla.
Combine the wet ingredients into the dry and mix until smooth.
Pour batter into well oiled (or use muffin liners) of muffin tin. 
Bake for 15 to 20 minutes (the tops of the cupcakes should bounce back when touched when they are done OR a toothpick comes our clean)
Cool completely before frosting.
 
While cooling make frosting.
 
Frosting Ingredients
           
4 sticks of softened butter
1/4 teaspoon of vanilla 
2-3 cups of powdered sugar (all depends on how sweet you want it; taste as you go)
 
In the bowl of your mixer cream together butter and vanilla. Slowly add the powdered sugar a half a cup at a time until you have the desired sweetness and consistency.
 
Toasted Coconut Topping
1 cup (or more) of coconut
 
In a pan on the stove over medium heat stir the coconut constantly until you have achieved the color and/or toastiness that you desire :)
 
 
Final Assembly
 
Once completely cooled frost the cupcakes and then either roll the frosted top in the coconut or using your hands pat on the coconut to give it the covered look.       


 Chocolate Cupcake with Vanilla Buttercream Cinnamon Dusting
 
Cupcake Ingredients
1/4 cup coconut flour
1/4 cocoa powder
1/4 teaspoon sea salt
1/2 teaspoon baking soda
3 eggs
1/4 cup grapeseed oil
1/2 cup honey
 
Preheat over to 375F
 
In a medium bowl combine flour, cocoa powder, salt, and baking soda.
In a large bowl whisk together eggs, oil, and honey.
Blend the dry ingredients into the wet until completely combined.
Pour into a lined cupcake tin.
Bake for 15-20mins until tops bounce back or toothpick comes out clean.
Cool completely.
 
Frosting Ingredients
**Use same recipe for buttercream as above**
 
Final Assembly
 
Frost with vanilla buttercream and then sprinkle cinnamon on top for an added zip.   


These will loved but gluten free and non-gluten free alike. I can't really tell a difference. 
 
Enjoy!